

Overview: What is a Win32 App and Why Use It in Intune?
A Win32 app refers to traditional Windows applications—typically packaged as .exe or .msi installers—that are not available in the Microsoft Store. These apps are common in enterprise environments and include software like Google Chrome, Adobe Reader, 7-Zip, and many in-house tools.
Why use Win32 apps in Intune?
- Flexibility: You can deploy virtually any Windows app, including legacy software.
- Custom install/uninstall commands: Tailor the deployment process to your environment.
- Advanced detection and requirement rules: Ensure apps install only where needed.
- Modern management: Combine traditional software with cloud-based deployment and compliance policies.
Using Intune to manage Win32 apps allows IT admins to modernize software delivery while maintaining control and visibility across all endpoints.
Guide: Packaging and Deploying a Win32 App with Intune
Folder Structure
Your working directory should look like this:
win32_packaging/
├── tool/       → Contains the IntuneWinAppUtil.exe
├── source/     → Contains the app installer (e.g., setup.exe, .msi, etc.)
└── output/     → Destination for the .intunewin package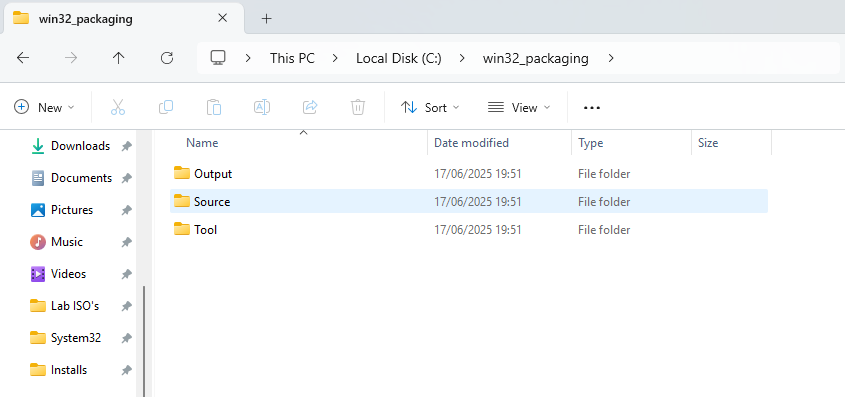
Step 1: Download the Packaging Tool
Download the Microsoft Win32 Content Prep Tool from GitHub:
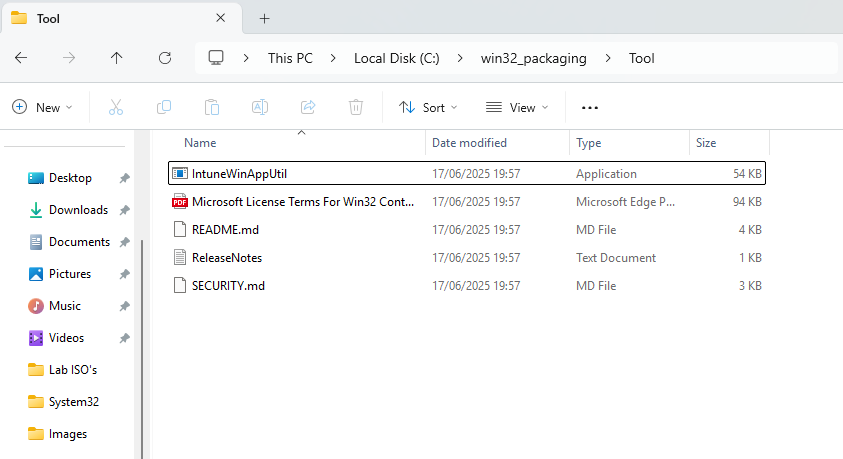
Extract the ZIP and place IntuneWinAppUtil.exe inside your tool/ folder.
- Download the Microsoft Win32 Content Prep Tool from GitHub:
https://github.com/microsoft/Microsoft-Win32-Content-Prep-Tool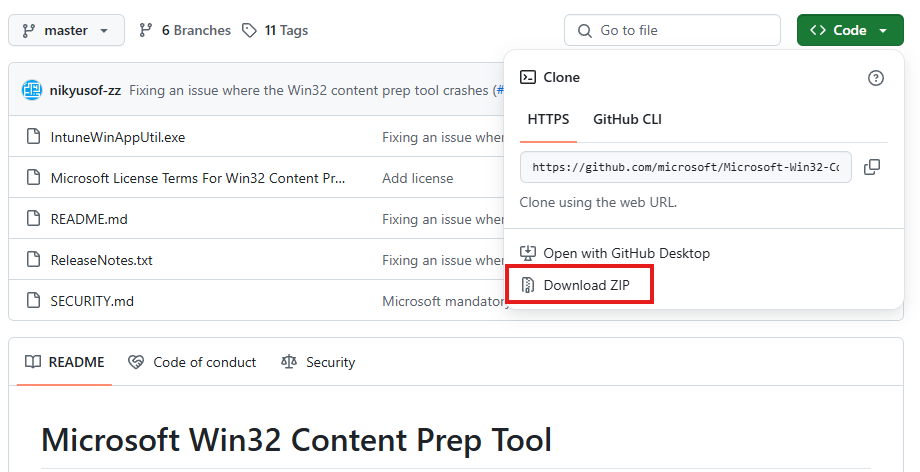
- Extract the ZIP and place
IntuneWinAppUtil.exeinside yourtool/folder.
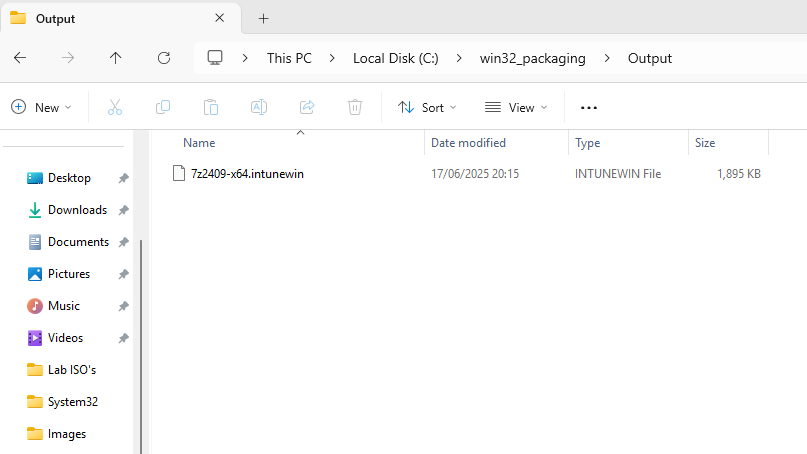
Step 2: Package the App
Open Command Prompt and change to the directory where the tool is stored. For example
cd C:\win32_packaging\Tool\Run the following command from the tool/ directory: In this example I have used 7Zip but you would alter based on your setup file
.\IntuneWinAppUtil.exe -c ..\source -s 7z2409-x64.msi -o ..\output
-cis the path to your source folder (where the installer is).-sis the name of the installer file (e.g.,setup.exeorinstaller.msi).-ois the path to your output folder.
This will generate a .intunewin file in the output folder.
Step 3: Upload to Intune
- Go to the https://endpoint.microsoft.com/.
- Navigate to Apps > Windows > Add.
- Choose App type: Windows app (Win32).

- Upload the
.intunewinfile from youroutput/folder.
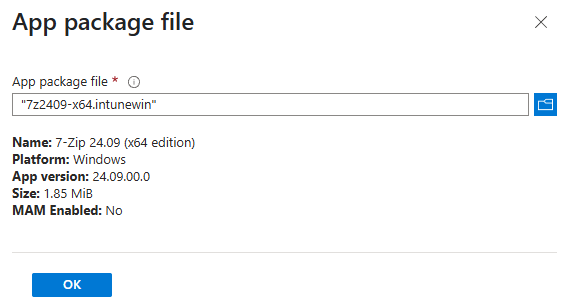
- Fill in the app information (name, description, publisher, etc.).
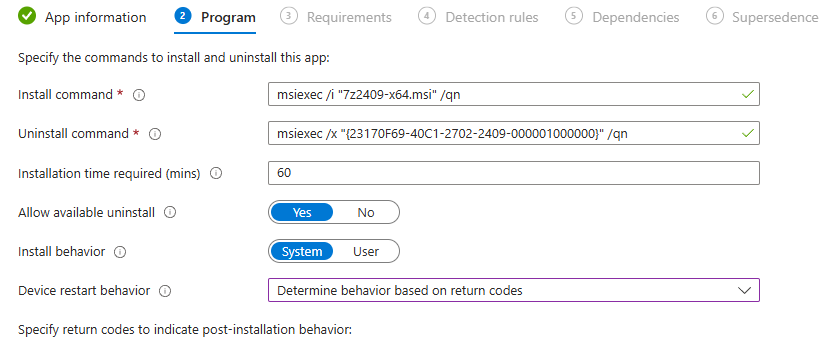
- Configure:
- Install command (e.g.
msiexec /i 7z2409-x64.msi /qn) - Uninstall command (if applicable)
- Requirements (OS version, disk space, etc.)
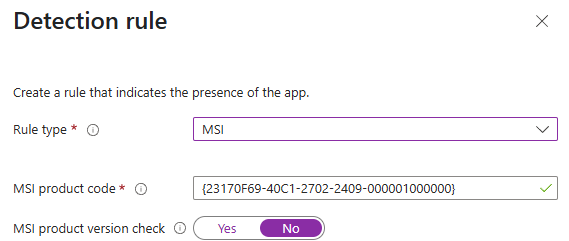
- Detection rules (e.g., registry key or file existence)
- Dependencies (if any)
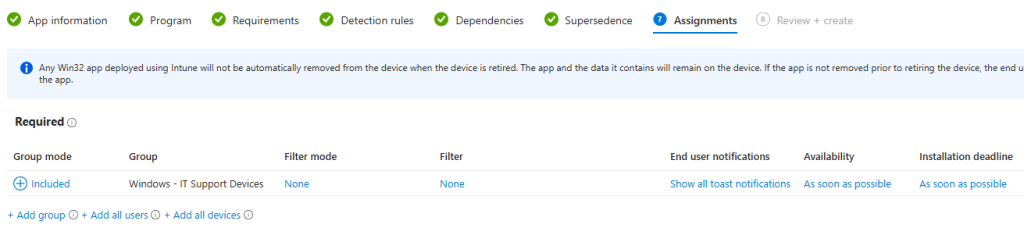
Step 4: Assign and Deploy
- Under Assignments, choose the groups or users to deploy the app to.
- Select Required, Available for enrolled devices, or Uninstall.
- Review and click Create.
Final Thoughts
Packaging and deploying Win32 applications through Microsoft Intune is a powerful way to modernize software delivery while maintaining flexibility and control. Whether you’re managing legacy apps or custom installers, the Win32 packaging process allows you to tailor deployments to your environment, enforce compliance, and streamline updates across your organization.
By following this guide from setting up your folder structure and using the IntuneWinAppUtil tool, to uploading and assigning the app in Intune you’re well on your way to mastering app deployment in a cloud-first world. With a bit of practice, this process becomes a repeatable and scalable solution for managing your software estate.