
Intune local administrator group management is essential for controlling device security on Entra ID (formerly Azure AD) joined Windows devices. In this guide, we’ll show you how to configure it using Microsoft Intune. With this approach, you can:
- Assign or remove local admin rights remotely.
- Use Entra ID security groups for simplified management.
- Apply consistent policies across all devices.
This method is particularly useful for IT support teams who need to ensure that only authorised users have elevated privileges on managed endpoints. By leveraging Intune’s account protection policy, you can automate and standardise local group membership across your organisation.
Which Local Groups Can Be Managed?
The Local Users and Groups MDM policy supports the following groups:
- Administrators
- Users
- Guests
- Power Users
- Remote Desktop Users
- Remote Management Users
These groups can be targeted individually, allowing you to tailor access based on role or department. For example, you might assign IT support staff to the Administrators group while restricting general users to the Users group.
Step 1: Create an Entra ID Security Group
To grant local admin rights, start by creating a security group in Entra ID:
- Go to https://entra.microsoft.com
- Select Groups
- Select New group
- Group Type: Security
- Group Name: e.g. Users – IT Support
- Azure AD roles can be assigned: No
- Membership Type: Assigned
- Members: Add users who need local admin rights
- Select Create
Step 2: Configure Account Protection Policy in Intune
Next, create an Account Protection Policy in Intune to manage local group membership.
- Sign in to the Intune Admin Center: https://intune.microsoft.com
- Navigate to: Endpoint Security → Account Protection → + Create Policy
- Choose:
- Platform: Windows 10 and later
- Profile: Local user group membership

- Click Create.
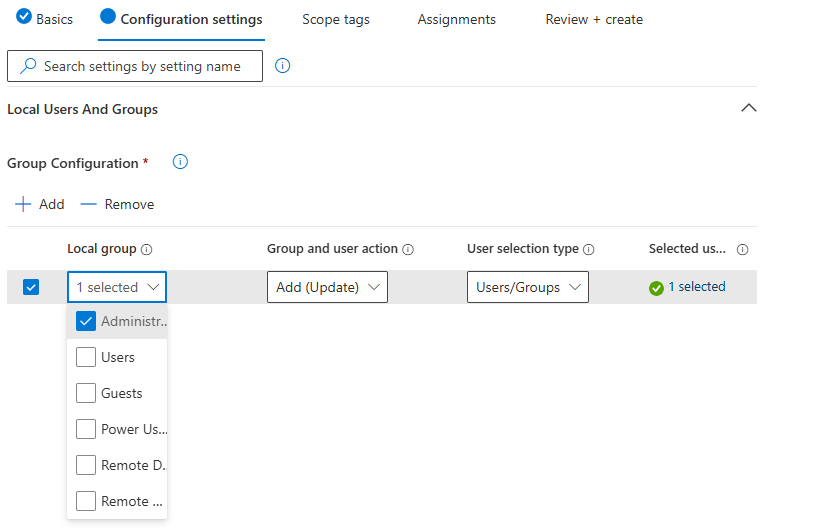
Configure Policy Settings
- Give the policy a name such as “Windows – Configure Local Admins” and optionally a description
- Select Next
- Select + Add
- Local Group:
- Select Administrators (or another group as needed)
- Group and user action
- Add (Update): Adds members without removing existing ones.
- Remove (Update): Remove specified members only.
- Add (Replace): Replace all existing members with the specified list.
- User Selection Type:
- Users/Groups: Choose Entra ID users or groups.
- Manual: Enter Username, Domain\Username, or SID.
- Select user(s)
- Select either the group we created in a previous step (Users – IT Support) or a single user
- Assign to either All devices or any group of devices you wish to target
- Use Assignment Filters for granular targeting if using All devices
- Select Next
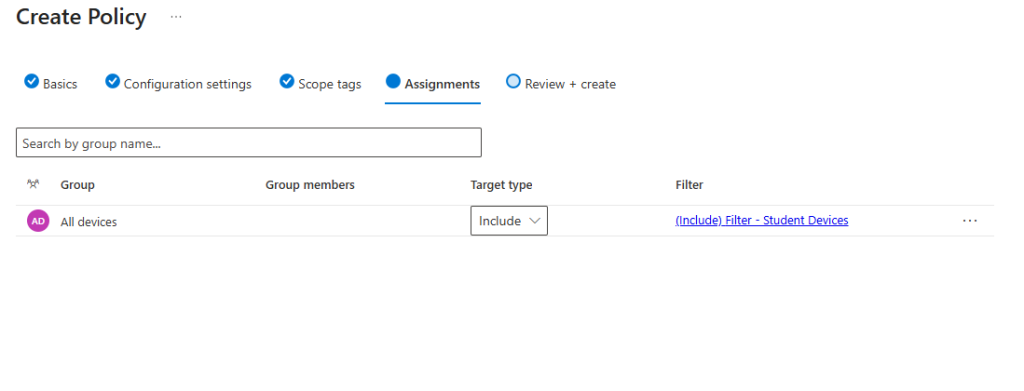
- Under Review + Create select Save.
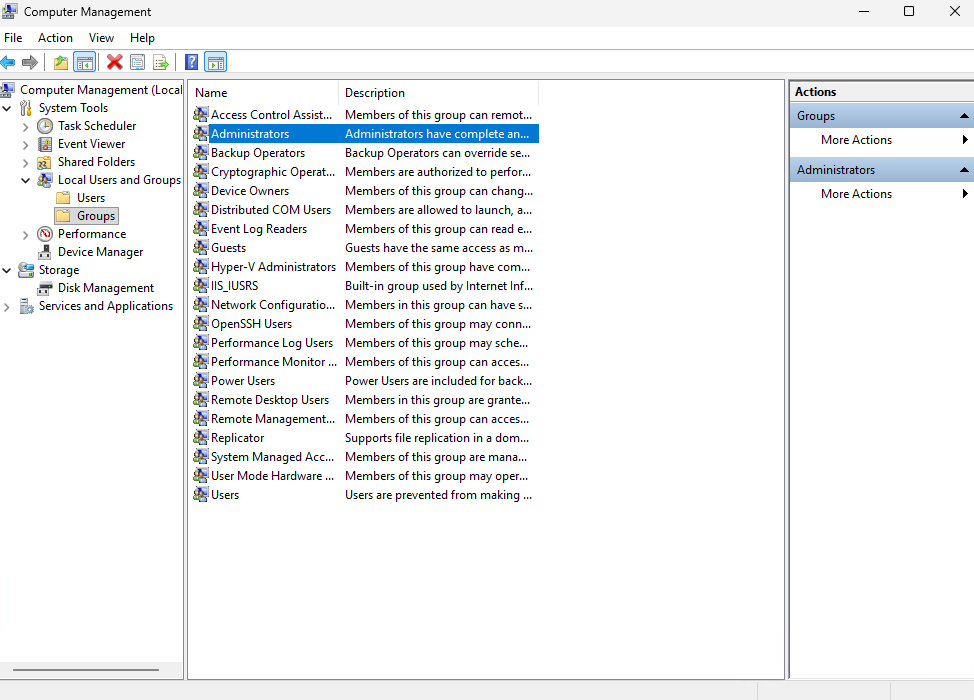
Step 3: Verify the Configuration
On a targeted device:
- Open Computer Management (compmgmt.msc).
- Navigate to Local Users and Groups > Groups > Administrators.
- Confirm the Entra ID group or user appears in the list.
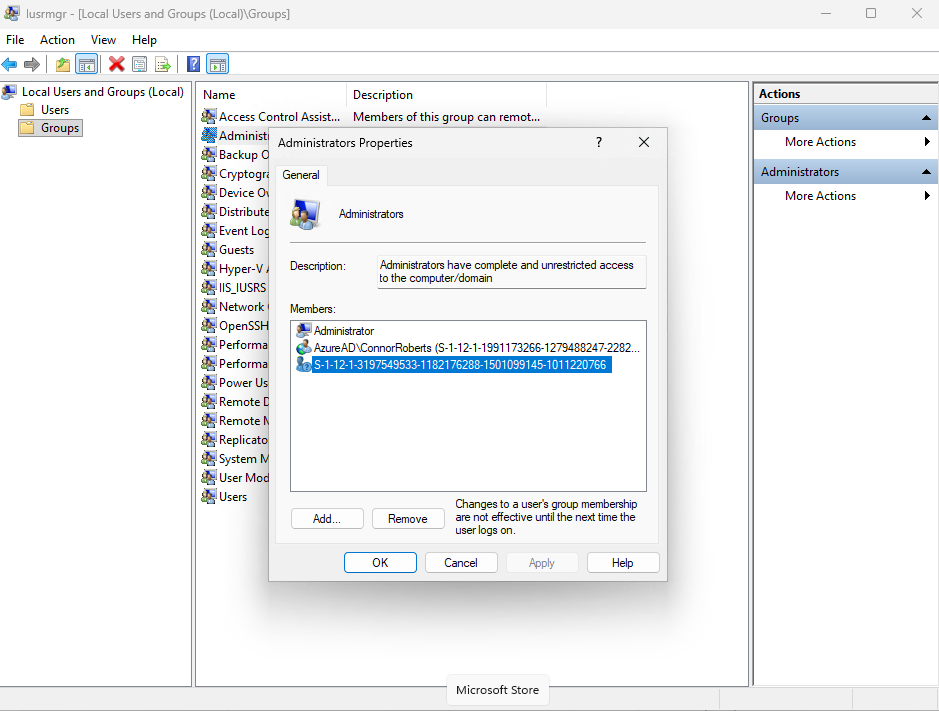
Identify Group SID
When you add individual users to your account protection policy, they will appear with the friendly name AzureAD\username. However, if you add a group, only the Security Identifier (SID) is displayed.
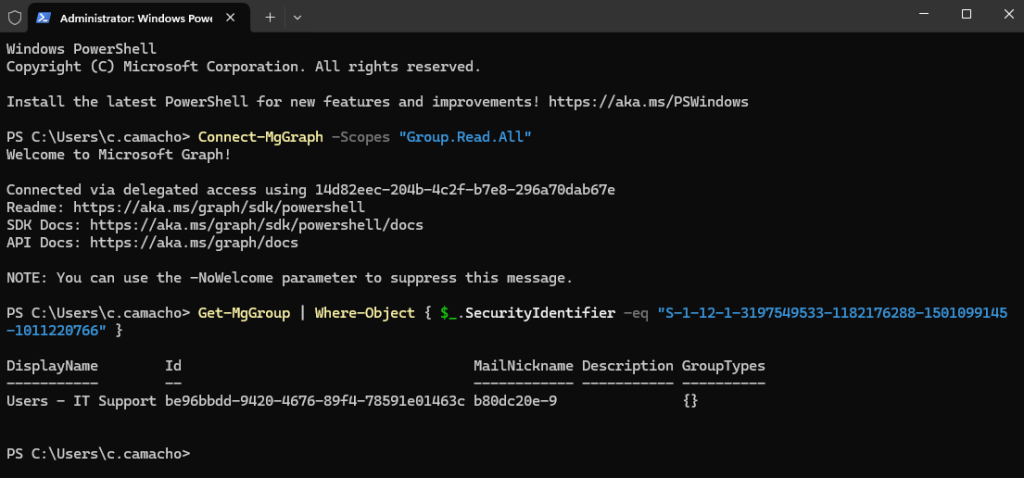
To verify the SID and ensure it matches the group you’ve added to your policy, you can run the following PowerShell command – just replace the placeholder SID with your actual value:
Connect-MgGraph -Scopes "Group.Read.All"
Get-MgGroup | Where-Object { $_.SecurityIdentifier -eq "S-1-12-1-3197549533-1182176288-1501099145-1011220766" }
You’ll be prompted to give consent, but once completed, the final output should look something like this:
Best Practices
- Use Update instead of Replace to avoid accidentally removing critical accounts.
- Regularly review group membership for compliance.
- Test policies in a pilot group before organisation-wide deployment.
Key Benefits
- Centralised management of local admin rights.
- Reduced security risks from unmanaged local accounts.
- Simplified onboarding/offboarding process.
Want More Intune & Entra ID Tutorials?
Explore my YouTube channel for clear, step-by-step video guides, expert tips, and the latest updates on Microsoft Intune, Entra ID, and best practices in device management. Subscribe now at (YouTube Channel) and stay up to date!