What is Microsoft Defender Credential Guard?
Microsoft Defender Credential Guard is a Windows security feature that uses virtualisation-based security to protect sensitive credentials. It isolates secrets such as NTLM password hashes and Kerberos Ticket Granting Tickets, which are stored in the Local Security Authority (LSA). By doing this, Credential Guard ensures these credentials remain secure—even if the operating system is compromised—preventing malware or unauthorised access.
Why Enable Credential Guard?
Credential Guard is designed to stop credential theft attacks like Pass-the-Hash and Pass-the-Ticket, which attackers use to move laterally across networks. It leverages hardware-based security features such as UEFI, Secure Boot, and TPM to provide strong protection.
Real-World Example
Imagine an attacker gains access to one device in your organisation. Without Credential Guard, they could extract cached credentials and compromise other systems. By enabling Credential Guard and enforcing it through Microsoft Intune, you ensure these protections remain active and cannot be disabled by end users strengthening compliance and reducing risk.
Step-by-Step Guide: Setting Up Credential Guard via Endpoint Security
Before you begin
Ensure devices meet the prerequisites—Windows 10/11 Enterprise or Education, UEFI with Secure Boot, TPM 1.2 or 2.0, and Virtualization enabled in BIOS.
Step 1: Sign in to Microsoft Intune Admin Center
- Go to https://intune.microsoft.com
- Sign in with your admin credentials
Step 2: Create a New Configuration Profile
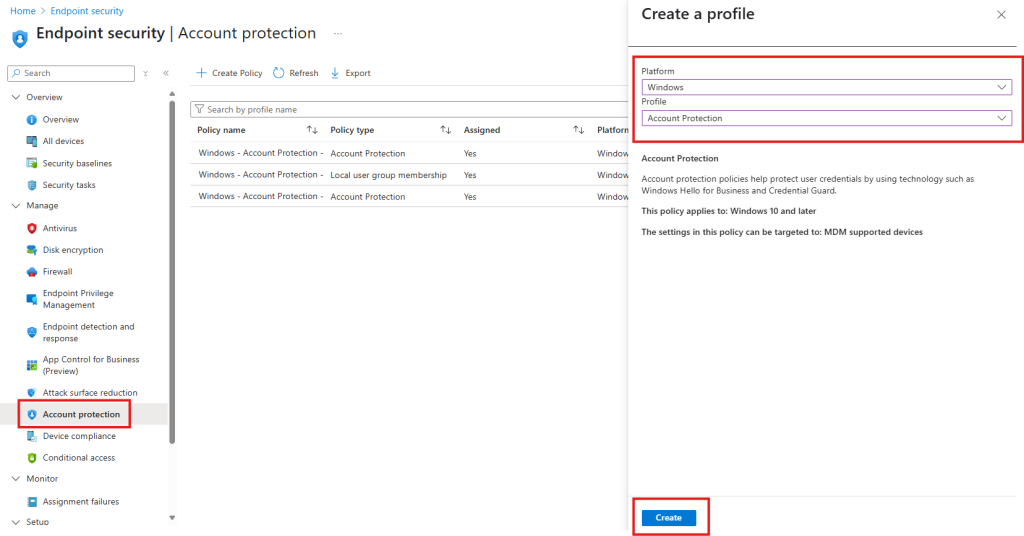
- In the left-hand menu, select Endpoint Security
- Under Manage select Account Protection
- Select Create Policy
- Under Platform select Windows
- Under Profile select Account Protection and then Create
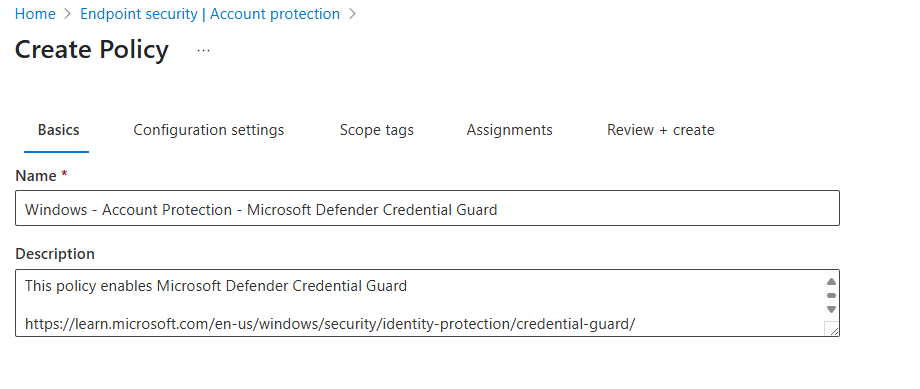
Step 3: Policy Basics
- Give the policy a meaningful name such as Windows – Account Protection – Microsoft Defender Credential Guard
- Optional – I always like to give a brief description and provide a Microsoft Learn link that relates to this policy
- Select Next
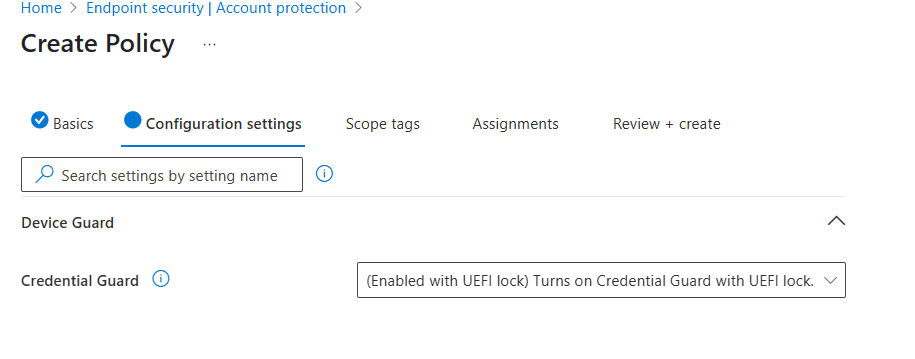
Step 4: Configuration Settings
- Under Device Guard expand the Credential Guard drop down box
- Select (Enabled with UEFI lock) Turns on Credential Guard with UEFI lock
- Select Next
Step 5: Scope Tags
- Scope tags are optional but if you use them this is where you would set them
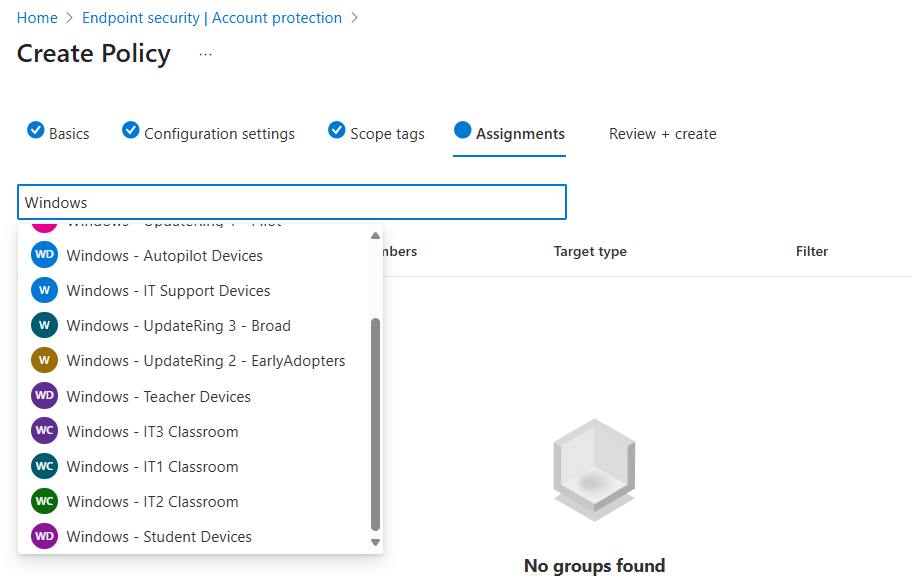
Step 6: Assignments
- Select the Search by group name text box
- You can either select All devices or groups of devices
- Select Next
- Select Save
Step-by-Step Guide: Setting Up Credential Guard via Device Configuration Policy
Step 1: Sign in to Microsoft Intune Admin Center
- Go to https://intune.microsoft.com
- Sign in with your admin credentials.
Step 2: Create a New Configuration Profile
- In the left-hand menu, select Devices
- Under Platform select Windows
- Under Manage devices select Configuration
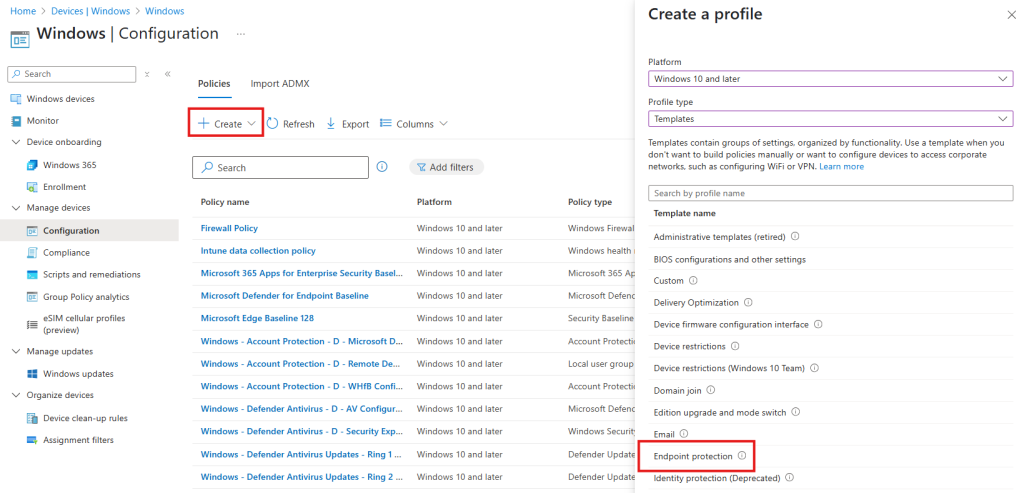
- Select Create Policy and then New Policy
- Under Platform select Windows
- Under Profile type select Templates
- Select Endpoint Protection
- Select Create
Step 3: Policy Basics
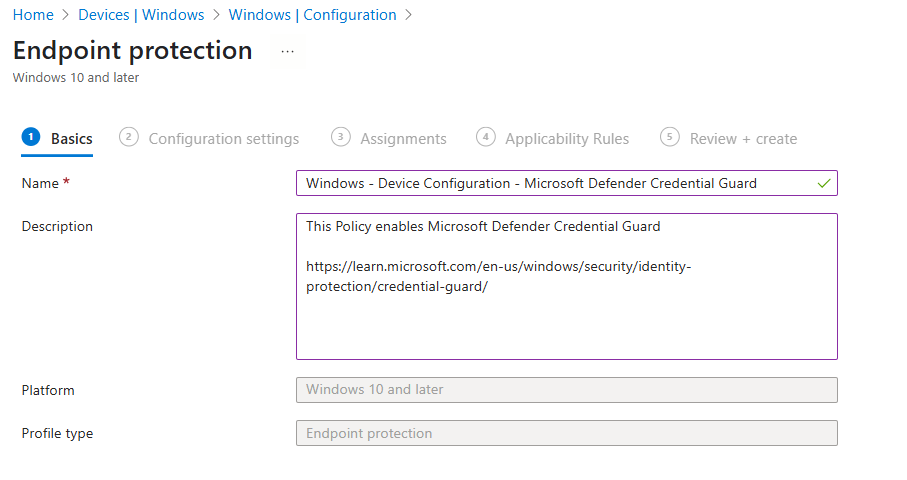
- Give the policy a meaningful name such as Windows – Device Configuration – Microsoft Defender Credential Guard
- Optional – I always like to give a brief description and provide a Microsoft Learn link that relates to this policy
- Select Next
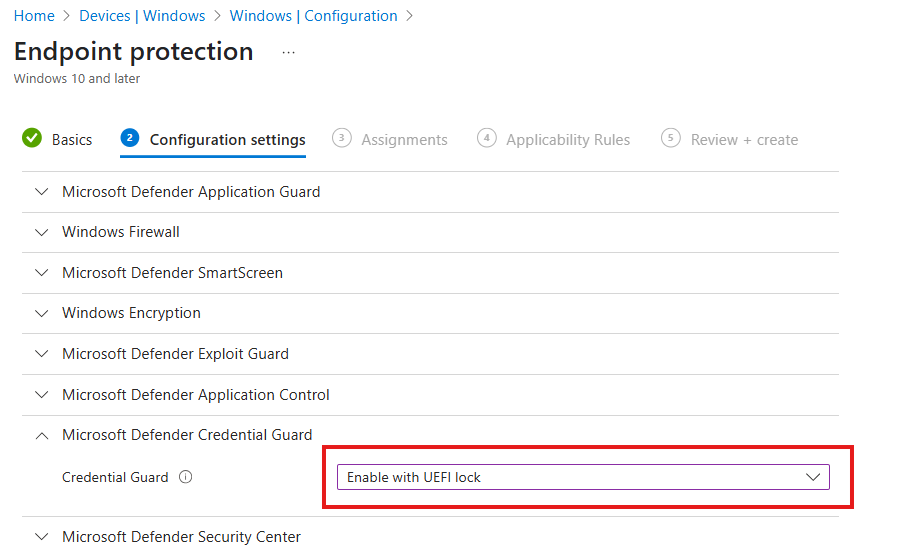
Step 4: Configuration Settings
- Expand Microsoft Defender Credential Guard
- Select Enable with UEFI lock from the drop down box
- Select Next
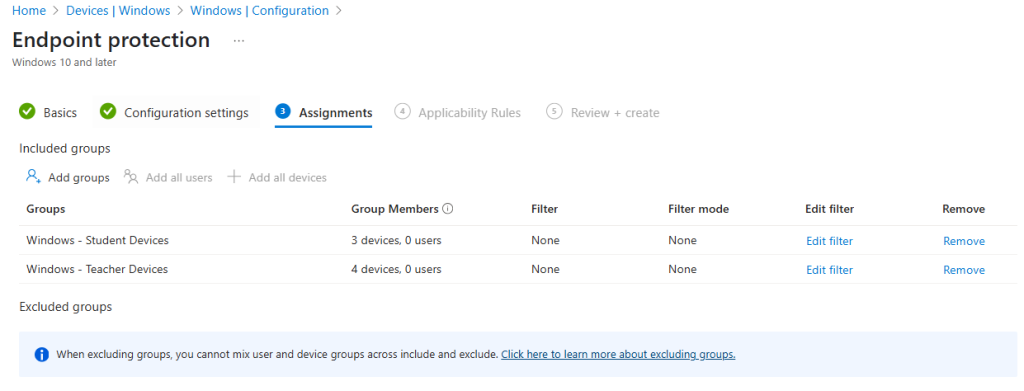
Step 5: Assignment
- You can either select Add all devices or Add groups and then browse and add the required groups
- Select Next
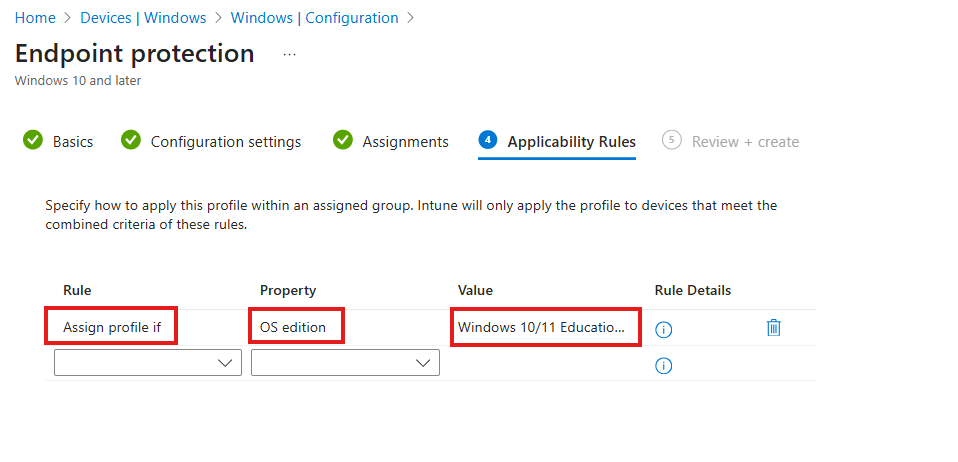
Step 6: Applicability Rules
- Under rule select Assign profile if
- Under Property select OS edition
- Under Value select both Windows 10/11 Enterprise and Windows 10/11 Education
- Select Next
- Select Create
Final Thoughts
Microsoft Defender Credential Guard is more than just a security feature—it’s a critical layer of defence for modern organisations. By isolating sensitive credentials using hardware-backed virtualisation, it dramatically reduces the risk of credential theft attacks such as Pass-the-Hash and Pass-the-Ticket, which remain common in enterprise environments. These attacks can lead to lateral movement across networks, data breaches, and costly remediation efforts. Credential Guard helps stop these threats before they start.
Deploying Credential Guard through Microsoft Intune ensures consistency and compliance across all managed devices. Using options like UEFI lock prevents users from disabling the feature, giving IT teams greater control and peace of mind. Combined with other security measures such as Secure Boot and TPM, Credential Guard forms part of a robust endpoint protection strategy that aligns with zero-trust principles.
If your organisation hasn’t enabled Credential Guard yet, now is the time. It’s a proactive step towards strengthening your Windows security posture and safeguarding your identity infrastructure. Start by reviewing your Intune policies and make Credential Guard a standard part of your device compliance baseline.
Want More Intune & Entra ID Tutorials?
Explore my YouTube channel for clear, step-by-step video guides, expert tips, and the latest updates on Microsoft Intune, Entra ID, and best practices in device management. Subscribe now at (YouTube Channel) and stay up to date!